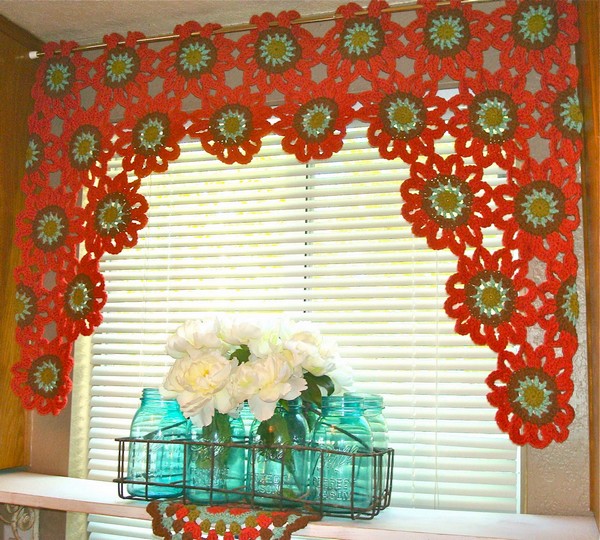
Merveilleux rideaux au crochet

Voici quelques de rideaux merveilleux, qui apportera la beauté à votre fenêtre de la cuisine. Découvrez de belles rideaux en crochet.
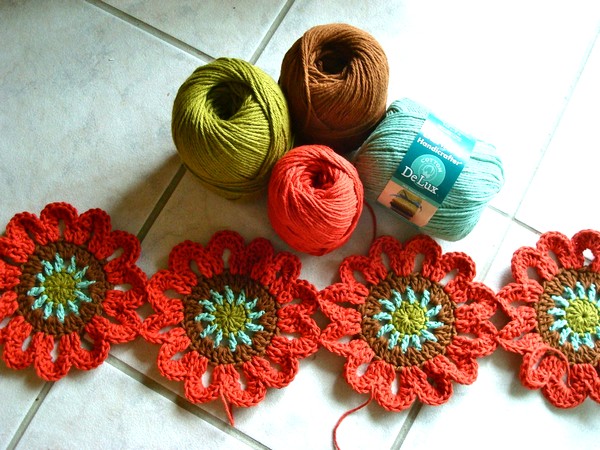
Pour donner un air jeune et amusant à la cuisine, nous sélectionnons un modèle de rideau trouvés dans un site de crochet.
Rideaux en crochet est un moyen idéal pour faire un petit changement à la cuisine.
J'adore ce rideaux. Qu'est-ce que tu penses?
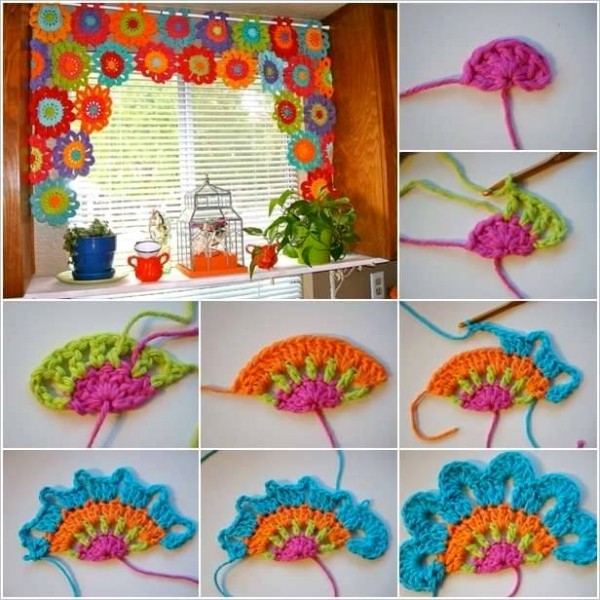
Comment faire de belles rideaux au crochet? Voir ci-dessous ...
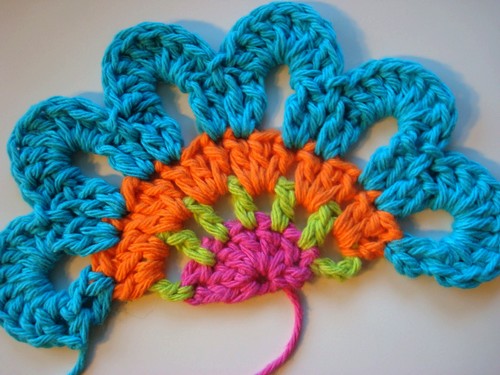
Comment faire un demi-fleur:
Explications en français ne sont pas disponibles, nous présentons la version originale anglaise. Nous espérons avoir contribué.
Flower Power Valance by Robin
Crochet hook US size H
Sugar & Cream and Peaches & Creme yarn in various colors in addition to other various brand cotton yarns that I had. Unfortunately I cant tell you how much yarn I used because I already had a lot of different colors in my stash.
DC = Double Crochet
CH = Chain
ST = Stitch
SL ST = Slip Stitch
Magic Ring = If you are not sure how to do this Google How to Crochet a Magic Ring
Join as you go = If you are not sure how to do this Google Join as you go Crochet Method
Une demi-fleur (voir l'image ci-dessus)
Make a magic loop
Chain 3 (counts as first DC)
DC 6 in loop Fasten off
(7 DC)
Draw up the loop so all
DC are on one side
Draw up loop in 3rd chain
of previous row
Chain 4(counts as DC ch 1)
DC ch 1 in each stitch
(7 DC ch 1 spaces)
Fasten off
In addition, I take a needle and run the starting thread (pink here) thru the 7 DC on the magic loop
just to insure a good hold.
(Just be sure you go in a clockwise direction to continue the circle - if you go the other direction your defeating the purpose)
Draw up loop in 3rd ch 1 space of previous row
chain 3(counts as first DC)
2 DC in same ch 1 space
3 DC in each chain 1 space across
Fasten off
(18 DC)
Draw up loop in 3rd chain from
previous row chain 3
(counts as 1st DC)
DC in same stitch, chain 4
skip next stitch, *2 DC in next stitch,
2 DC in next stitch, chain 4*
repeat from * until you reach the last 2 stitches
skip stitch, 2 DC in last stitch
Fasten off
Draw up loop between the 2 DC of previous row
ch 1 SC in loop
(I always start my sc joins like this)
8 DC in ch 4 sp
*skip 2 DC, slip stitch, skip 2 DC,
8 DC in chain 4 space*
repeat * across until the last 2 DC group,
SC between last 2 DC, fasten off
I use the join as you go method
when making this.
Fleur pleine
Row 1: Make a magic loop. CH 3 (counts as first DC) 11 DC in magic loop. Join with SL ST to 3rd CH of beginning CH 3. 12 stitches.
Fasten off if you are changing colors.
Row 2: Join the next color in any DC. Ch4 (counts as your first DC & CH 1). DC CH 1 around in each ST. Join with SL ST in the 3rd ch of the beginning CH 4 to close round. Do not fasten off. 12 DC with a ch 1 space in between.
Row 3: SL ST into the first CH 1 space. CH 3, 2 DC in the same CH 1 space. 3 DC in each CH 1 space around. SL ST to the 3rd CH of the beginning CH 3 to close round. Fasten off if you are changing colors. 36 DC (3 in each space).
Row 4: Join next color in any DC. CH 3 DC in same stitch CH 4, *skip over one DC, 2 DC in next ST, 2DC in next ST chain 4*. Repeat from * to * around until last 2 ST, SK 1 ST, 2DC in last ST. Join with SL ST to 3rd CH of beginning CH 3. Your ending join will be between the 2 sets of DC. 12 CH 4 spaces. Do not fasten off.
Row 5: Make 8 DC in chain 4 SP. Skip 2 DC, SL ST in between the 2 sets of DC. SK 2DC, 8 DC in next CH 4 SP. Repeat around. To end round SL ST in beginning ST and fasten off.
I used the join as you go method when making this curtain. The join was in made in between stitch 4 and 5 of the 8 DC on the last row. See the picture on where to join each flower.
Assemble as follows
Row 1: 8 full flowers
Row 2: Half flower, 7 full flowers, half flower.
Note: I added the full 7 flowers first, then went back and added the half flower on each end with the join as you go method into the space. See the picture for where to start your first full flower on the 2nd row. It will not be directly under the 1st flower. You will be joining the flowers on the bottom of the 1st row and on the sides of the 2nd row as you go.
Row 3: 2 full flowers on each side
Row 4: 1 half flower and 1 full flower on each side. See row 2 for the order in which they were added.
Row 5: 1 Full flower on each side.
So there you go!
If you want to make your valance bigger or smaller just add or take away flowers
Source: onceuponapinkmoon.blogspot.pt
Laisser un commentaire
Autres publications